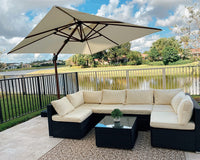
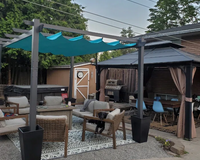
When it comes to creating a comfortable and stylish outdoor space, nothing compares to the Purple Leaf Hardtop Gazebo. Whether you're hosting summer barbecues, enjoying quiet mornings with coffee, or simply escaping the sun, this gazebo is more than a shelter—it's a statement of outdoor luxury and durability.
Installing a hardtop gazebo in your backyard is an exciting and rewarding project that can elevate your outdoor living space. Not only does a gazebo add elegance and style, but it also creates a practical area for relaxing, dining, and entertaining guests. In this guide, we’ll walk you through the complete gazebo installation process—from choosing the best location and preparing the foundation to assembling the structure with confidence.Whether you're a seasoned DIYer or new to home improvement, this step-by-step guide is packed with helpful tips, tools, and advice to make your gazebo project a success. With the right preparation and clear instructions, you can turn your backyard into the inviting, functional space you’ve always imagined.
Get ready to enjoy the beauty, shade, and charm of a professionally installed outdoor gazebo—right in your own backyard.
1. Planning and Preparation
Before diving into your backyard gazebo project, proper planning and preparation are essential to ensure a smooth and safe installation process—especially for a hardtop gazebo.
Choose the Right Location for Your Gazebo
Start by selecting a flat, well-drained area in your backyard. Avoid low-lying spots where water tends to collect. Consider how much sunlight the area receives throughout the day. If you enjoy full sun while relaxing outdoors, choose a sunny location. Prefer partial shade? Look for a spot that gets some relief from the sun during peak hours. For extra protection, try to install your gazebo in an area sheltered from strong winds, as heavy gusts can impact the stability and longevity of the structure.
Check Local Zoning and Permit Requirements
Before installation, it's crucial to check with your local municipality about any building codes or zoning regulations. There may be rules about how close your gazebo can be to property lines, or limitations on structure size and height. Always get approval if needed to avoid complications down the road.
Gather Tools and Materials Ahead of Time
Having the right tools on hand makes the assembly process faster and safer. Essential tools for building a backyard hardtop gazebo include hammer, drill, level, tape measure, ladder, safety gear (gloves, safety goggles, and steel-toed shoes).
Wearing proper safety equipment is strongly recommended during the installation to prevent injuries.
 2. Lay the Foundation
A solid foundation is crucial for ensuring your outdoor gazebo stands strong throughout the year—no matter the weather. Choosing the right base and preparing it properly will help prevent water damage, shifting, or long-term structural issues.
Choose the Right Type of Gazebo Foundation
Depending on the size and permanence of your gazebo, here are three common foundation options:
Concrete Slab: Ideal for large or permanent hardtop gazebos, concrete slabs offer maximum strength and stability. They’re durable and require little maintenance over time.
Gravel Pad: A great choice for smaller or temporary gazebos. Gravel provides excellent drainage and is easier to install than concrete.
Patio Pavers (Courtyard Stones): These offer both aesthetics and function. Suitable for mid-sized gazebos, pavers are easier to adjust and replace than poured concrete.
Prepare the Ground for Your Gazebo Base
Clear the Area: Remove grass, rocks, roots, and debris from the installation site.
Level the Surface: Use shovels, rakes, or a compactor to make the ground as level as possible.
Measure Accurately: Based on your gazebo’s dimensions, mark out the exact size and layout of the base to ensure a precise fit.
How to Lay Different Types of Gazebo Foundations
For Concrete Slabs:
Build a wooden frame (formwork) to hold the concrete in place.
Mix the concrete as instructed by the manufacturer.
Pour it into the frame, then use a screed board and float to smooth the surface.
Allow proper curing time before beginning gazebo installation.
For Gravel Pads:
Lay landscape fabric to block weed growth.
Fill the area with crushed gravel and compact it firmly for a stable, even surface.
For Patio Stones or Pavers:
Spread a layer of sand over the leveled area.
Place the pavers and use a rubber mallet to secure them in position.
Adjust stones individually as needed and fill in gaps with additional sand.
By investing time in building a strong and level foundation, you'll ensure your gazebo is stable, long-lasting, and resistant to common outdoor issues like drainage problems or shifting over time.
3. Assemble the Gazebo Base
With a well-prepared foundation in place, it’s time to begin assembling the base of your gazebo. This step lays the groundwork for a secure and balanced structure.
Install the Floor Joists
Start by placing the floor joists—these horizontal beams provide essential support for the floorboards. Arrange the joists according to your gazebo’s design plan, typically perpendicular to the outer frame of the base. Be sure to: Space each joist evenly. Ensure all joists are level and parallel. This helps create a stable, level surface and prevents issues such as sagging or uneven flooring later on.
Secure the Support Posts
Once the joists are in place, install the vertical support posts. These structural elements are critical because they hold up the roof and upper frame of your hardtop gazebo.Position the posts at the designated locations on the base, according to your assembly instructions. Use a level to check that each post is completely vertical before securing. Anchor the posts firmly using bolts or brackets to ensure stability, especially in areas prone to wind. Correctly aligned and secured posts will ensure your gazebo remains strong, safe, and weather-resistant for years to come.
Install the Gazebo Floor
After the support posts are in place, you can move on to laying the floorboards: Start at one side and work your way across the structure. Leave a small gap between each board to allow for natural expansion during temperature changes. Use corrosion-resistant screws to fasten the boards securely, and ensure they are flush with the surface for a clean finish.
4. Build the Gazebo Frame
The frame is what gives your hardtop metal gazebo both its shape and structural strength. A well-assembled frame not only supports the roof securely but also adds elegance and definition to your outdoor space.
Install the Vertical Posts
Begin by placing the vertical support columns into their designated positions around the base. These posts are critical, as they will carry the full weight of the roof and define the height of your gazebo. Use a level to ensure each post is perfectly vertical before securing it. Depending on the design and materials of your gazebo, connect the posts using bolts, lag screws, or brackets for maximum strength. Double-check all alignments before moving to the next step, as uneven posts can affect the roof installation later
Attach the Horizontal Beams
Once the vertical posts are in place, install the horizontal beams across the top. These beams connect each post and form the upper perimeter of the gazebo frame. Securely fasten beams with bolts or screws as instructed in your assembly manual. Ensure the beams are level and flush at all corners—any misalignment here can cause issues during the roof assembly. The horizontal beams not only stabilize the structure but also create a clean outline for the walls and roof to follow.
Add Diagonal Bracing for Extra Stability
For enhanced durability—especially in areas with strong winds or heavy snow—install diagonal braces between the vertical posts and horizontal beams. These braces help reinforce the frame and reduce movement caused by external forces. Fit each bracket snugly and fasten it securely with screws or nails. Proper bracing is a key part of any weather-resistant hardtop gazebo frame installation.

5. Roof Assembly and Roof Panel Installation
The roof is one of the most defining features of any gazebo. Not only does it enhance the overall appearance, but it also serves as the primary defense against the elements. Proper roof assembly is essential for both durability and long-term weather protection.
Install Roof Trusses or Frames
Begin by assembling and installing the prefabricated roof trusses or roof panels that create the sloped structure of your gazebo. Attach the trusses to the top horizontal beams of the frame, making sure they are evenly spaced and securely fastened. Use a level and measuring tape to ensure proper alignment—any misalignment at this stage can cause serious issues when installing roofing panels or shingles later. Double-check each connection point for stability before moving on to the roof covering.
Install Roof Panels or Roofing Materials
Once the trusses are in place, you can begin attaching the roof panels or shingles. Depending on your gazebo model, this may include metal roof panels, polycarbonate sheets, or wooden planks. Start from the bottom edge of the roof and work your way upward. Overlap each panel or board to ensure proper water runoff and prevent leaks. Secure each section with appropriate roofing screws or bolts, following the manufacturer’s instructions for wind and weather resistance.
If you are using shingles or tiles:
Begin installation at the lower edge and lay the shingles in horizontal rows, overlapping each row over the previous one. Secure each shingle with roofing nails, and use roofing adhesive if needed for added wind protection. Finish the roof by installing ridge cap tiles at the peak for a clean, polished look and additional weatherproofing.
Optional: Install Eaves or Overhang Panels
To further protect your gazebo and extend its lifespan, consider adding a sun visor or overhang panel. These components help shield the edges of the roof from sun, rain, and snow, reducing wear over time and adding a decorative touch.
6. Finishing Touches and Customization
With the structure and roof fully installed, your gazebo is almost complete. Now it's time to add those personal touches and functional upgrades that transform your gazebo into a cozy, stylish, and inviting outdoor retreat.

Add Side Panels or Insect Screens
Depending on your needs and location, consider installing privacy panels, mesh screens, or leaving the sides open for maximum airflow. Privacy panels help shield your space from neighbors or nearby structures. Insect screens keep bugs at bay while allowing fresh air in—perfect for summer evenings. If adding panels or screens, take accurate measurements and install them securely between the support posts to ensure a snug, stable fit.
Incorporate Decorative Elements
Enhance your gazebo’s appearance with thoughtful decorative trim and architectural details. Add trim along roof edges, or at the tops and bases of columns, to hide seams and create a polished finish. Install decorative brackets, cross beams, or lattice under the eaves for added charm and character. Consider lighting or hanging planters to bring warmth and visual appeal to the space.
Stain or Paint Your Gazebo
Protect your investment and boost curb appeal by applying exterior stain or weatherproof paint. Choose a color that complements your home’s exterior and surroundings. Before applying, make sure all surfaces are clean, dry, and sanded if needed. Use a brush, roller, or sprayer based on the finish you prefer, and always follow the manufacturer’s application instructions for best results. A weather-resistant finish will help your gazebo stand strong through changing seasons.
Celebrate Your Completed Outdoor Gazebo
Congratulations—your backyard hardtop gazebo is complete! From laying a solid foundation to adding custom features and finishing details, you’ve created more than just a structure. You’ve built a relaxing escape, a centerpiece for gatherings, and a space for lasting memories. Whether you're using it as a shaded reading nook, an outdoor dining area, or a space to entertain family and friends, your gazebo stands as a symbol of craftsmanship, creativity, and care. So take a moment to admire your work, sit back, and enjoy the comfort and beauty of your new outdoor living space. You’ve earned it!


